BN Morris Project (maybe) S/N 12655

Actually pulled a rib today, just one. I was surprised to find two steel tacks and one steel nail holding it to the inwale, just like Stelmok and Thurlow described in their description of restoring the Gerrish. I didn't dare pull the larger steel nail for fear of splintering the mahogany inwale and snipped it off flush. Found it challenging to trace the taper of the old broken rib to the new flat stock. Appears to be a slightly asymmetrical taper between fore and aft.
 
I was thinking about your comment that it was challenging to trace the taper of the old rib on to new rib stock. Have you considered using easy to remove painter's tape to make a pattern? You could cover the old rib with it, trim it to the shape of the old rib, carefully remove it and apply it to the new stock. Years ago I watched a boot maker use duct tape wrapped around the customer's calf and ankle to make a pattern for a women's form-fitting boot top. One advantage of this method is that the tape would also hold the broken rib together.

I've used this method in making patterns for a number of things, small and large, over the years.
 
Scott,
Send me your snail mail address on my personal email and I will send you a copy of a tracing that Paul Miller did for me several years back.
Denis
 
I like this idea. I've tried roofing tar paper, nice and thick (also readily available in my garage). If I double up the tape it would stiffen to minimize any distortion. I could even use painters and back it with duct tape for stiffness. I have to build a steam box yet so I've time to work this out. Thanks.
 
Scott, unless I'm not understanding, I think that a rib taper is easy. The taper is on one side of the rib only for most canoes with tapered ribs. ANd, the taper is positioned so that it is toward the center of the canoe. I have a taper jig. Measure the top of the rib and that's the width you are shooting for. Then set the jig to taper to that width over about 16" or so. I make my jigs from scrap 3/4" ply with a stop on one end and 3/4" fence for the taper. Once it's in the canoe it all works. The rib is a bit long and has to be cut off but I usually bundle my ribs by groups of similar lengths.
 
Scott,

I needed to taper several ribs for my Old Town Guide restoration. I determined the amount of taper needed from the old rib, and then built a jig for my table saw into which I place a piece of my rib stock. (The taper is largely confined to the vertical sides of the canoe. Therefore, you do not taper from the center of the rib. I only taper the last 16 inches, or so, of each end.) I adjust my table saw for cutting height and I adjust my fence and the jig so that the saw blade cuts and tapers my rib stock, but does not cut my jig. I then slide the jig and the rib between the cutting blade and my fence so that the exposed taper is cut from the stock. With one cut done, I retract the jig, and take the tapered rib out of the jig, flip the rib end-for-end, flip the rib over, place the stock back into my jig, and run it through the saw again. The result is a rib tapered along one edge of the rib and at both ends of the rib. (If you wanted to taper both edges of the rib, you would simply make your jig with a narrower taper such that less of the rib is cut off with each pass through the saw, and you would make two more cuts on the other edge of the rib.)

The tapered rib then needs to be rounded over at my router table.

Attached are photos of a Rockler adjustable tapering jig, and my rib tapering jig by itself, and with rib stock, untrimmed and trimmed.

Mark Douglass

Adjustable jig on table saw.jpg
 

Attachments

  • Rocker taper jig.jpg
    Rocker taper jig.jpg
    504.6 KB · Views: 519
  • Rib tapering jig 1.jpg
    Rib tapering jig 1.jpg
    504.2 KB · Views: 525
  • Rib tapering jig 2.jpg
    Rib tapering jig 2.jpg
    493.2 KB · Views: 527
  • Rib tapering jig 3.jpg
    Rib tapering jig 3.jpg
    494.9 KB · Views: 550
Last edited:
Mark, great pictures and explanation of the jig. Although I was planning on shaping by hand I could still probably use a jig like this. Mainly what I was concerned with is; are Morris ribs like all others in that one side is usually straight. The first one I pulled near the center of the canoe appeared to have some taper on the straight side. As I measure the center at 2 1/4 inches and within three or four inches from center of the rib it drops to 2 1/8 inches. Which could be just wear or shrinkage. Although it was suggested by someone local to trace the old to the new so it lead me to believe that a standard formula may not apply. i.e. start shaping 16 inches from the end after measuring the desired rib top end width. Anyway I'm at a stand still right now til I address the stain or no stain of the ribs I hope to bend. After stripping I have some bright reddish looking ribs of various consistency and some variable red to brown looking planks ( bottom planks more brown than red). I may have to use a teak cleaner to see if the colors even out and go from there. Thanks to all for the advice.
 
Scott,

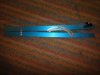
In Stelmok and Thurlow's book, it says that new ribs without careful staining will stand out like a sore thumb. It recommends taking pieces of old rib stock stripped of all the old varnish and staining and varnishing them with new stain and varnish. Also, then taking pieces of new rib stock and experimenting with various mixtures of stains color to try to approximate the color of the old newly stained and varnished ribs. So, you may wish to take old ribs and saw them into several three inch pieces to then be test stained and varnished. Then do the same with some new rib stock, testing the various mixtures of stain and varnish combinations, and making notes on the back of the rib pieces as to the stain combinations used. You will end up with your own set of "paint chips" or, rather, varnish/stain chips.

By the way, I read somewhere on the website of a recipe for staining and varnishing the inside of a B.N. Morris canoe to look like mahogany. The thread is entitled "Morris stain formula."

The other day as I began working on my newly acquired 1915 B.N. Morris, the thought struck me that all this information I was learning about canoe repair from reading books and from reading this website may well have been second nature to my grandfather, or to my father, who was, coincidentally, born in 1915.

Mark Douglass
 
I just came across these pics of an open gunnel Morris with end caps, that I restored a few years ago.
I hope they can be of some use to you.
.......DaveSCAN0009.jpgSCAN0008.jpgSCAN0007.jpg
 
I have a Morris which someday will be restored, so I have been storing away any useful information I come upon. Denis Kallery, who has done some work on Morris canoes, has posted the following posts regarding Morris interior color, which was usually not natural cedar:

"So far I have been unsuccessful in my search for the formula I used to stain the inside of our Belle Isle. I put it in a really safe place so I wouldn't loose it. Apparently too safe!

"These ,however,are the stains I mixed together they are: Sedona Red #222 this was the base, Red Mahogany #225, Special Walnut #224 and Golden Oak #210 B. The last three were added to adjust the color to what I wanted and in small amounts. I'm sorry that I can't be more accurate. What I did was take raw Cedar and kept experimenting till I got what I wanted. If I do find the formula I will post it."

Denis found his formula. for subsequently, Kathy Klos posted the following:

"Here's the formula Denis devised for staining the interior of a B.N. Morris canoe:

"Using Minwax products:

"2 parts Red Mahogany 225
2 parts Golden Oak 210B
1 part Special Walnut 224
1 part Sedona Red 222"

I understand that others have used Denis's formula with success.
 
Scott, unless I'm not understanding, I think that a rib taper is easy. The taper is on one side of the rib only for most canoes with tapered ribs. ANd, the taper is positioned so that it is toward the center of the canoe. I have a taper jig. Measure the top of the rib and that's the width you are shooting for. Then set the jig to taper to that width over about 16" or so. I make my jigs from scrap 3/4" ply with a stop on one end and 3/4" fence for the taper. Once it's in the canoe it all works. The rib is a bit long and has to be cut off but I usually bundle my ribs by groups of similar lengths.

OK...I've finally figured it out. And not for nothing but this is a notable Morris rib detail. I thought I was imagining things when I kept seeing a two sided taper on what according to most accounts should be a single sided taper towards midships. A friend unbent two of my ribs so we could look at the taper. The #19 full rib from the bow has a taper on both sides and the #12 rib has a taper on just one side. Unless this is an anomaly I have to assume that ribs at midships have dual tapers and others single tapers. This is an original rib in that there are no extra tack holes evident. So now that my first rib was so easy I can continue with rest! lol
 
Beats me. I have no clue on taper details like that. You're sure they are original? Perhaps someone will chime in.
 
Not sure where #19 and #12 are on your canoe (not sure how you're counting), but it would make sense that a center rib would have a taper on both sides, but one nearer the bow or stern would be tapered on one side. The ones nearer the ends when bent over the hull will lean toward the middle of the boat because of the way they lay over the curve of the hull. Therefore you'd only taper the amidships sides of those ribs. Amidships ribs- little or no lean, so taper both sides.
 
Beats me. I have no clue on taper details like that. You're sure they are original? Perhaps someone will chime in.

The canoe had been tweaked along the way but from what I could see, all of the basics were original. The cracked ribs and damaged planking were all there before it was glassed. I am pretty sure that the ribs were original.
Here are a few new shot's and one I think I had posted earlier. I think you can see what he is referring to, or at least imagine it;)


017.jpg016.jpg018.jpg
 
All looks original. You can see in the pics why center ribs are tapered on both sides (see post above). You don't have to worry too much about taper. You can bend the ribs and then compare with the original rib and/or test fir the rib, cutting it down to its final shape by hand using block plane and spokeshave until you get the shape right. If you haven't done it before, you'll be amazed how easy cedar is to work.

Your floor rack also looks original. What's visible in the photo is typical Morris.
 
I wonder if this is a KNown Morris trait? It seems to me that the rib tops would then be of different widths if some were tapered both sides and some were not. In that case it would require a bit more taper for the ribs near the end. For instance; middle ribs would be tapere 1/4" on each side and end robs tapered 1/2" on the one side. ?? And, this is an open gunnel canoe, right? I can understand a closed gunnel canoe rib may be hand planed in width to fit the pocket. I would also expect the literature to mention this as a selling point and not be a Morris trade secret.
 
Ok, I went back and looked at some of the photos and it is an open 'wale. Which makes me wonder if perhaps it was converted to open somewhere back in time? But the photos are suggestive that's that the way they made them. Perhaps someone knows and will clarify. Or perhaps a discovery is in the making.
 
Yes, that's the #19 rib in the second pic just to the right of the tin patch (one of fifteen patches). Rib are 2 1/4 inch tapering to just 1 inch at tops. Ribs to either side, maybe six altogether have this same dual taper. After removing lots of varnish ribs all have the same floor rack shadow and there are no extra holes in the planks to suggest replaced ribs. I doesn't seem to make sense except from a production standpoint (extra work). I would have to pick this rib to start with. lol
 
Last edited:
Here are a couple of pictures of 18' Morris #6466. I think they show how and why the ribs are tapered. The gunwales are missing, although I have a few pieces of the original pocketed inwales. The ribs are in original, unrestored condition.

The first picture clearly shows how the ribs at either end slant towards the center of the canoe -- which is why they are tapered on only one side -- to minimize the visual impact of the slant. The center ribs are also tapered, on both sides. Tapering all the ribs was necessary to make them fit into the pockets in the inwales -- all the ribs are just shy of 1" wide at the top, to fit into the 1" pockets. On an open waled canoe, there would not have been the same need for tapering, or at least for such narrow tapering. but apparently they got tapered narrowly anyway.

cr sm 100_1757.JPG cr sm 100_1777.JPG cr sm 100_1775.JPG cr sm 100_3348.JPG sm 100_3353.JPG cr sm 100_3357.jpg
 
Greg, great pictures. Thanks. I must get another camera. Seems to confirm the differing tapers. And yes mine is an opened waled canoe. I've "heard" other suggestions as well for tapering; reduces weight, minimizes flattening of hull where non-tapered ribs try to springback from bending, looks nice, and I was thinking that it may also allow the inwale to sit more fairly against a narrower rib top which may be more important in an open waled canoe where the joinery there is more visible.
Made my steam box yesterday. Hopefully I'll make steam today. And then rib by rib......well you know the rest of the story. <grin>
 
Back
Top