Paul Scheuer
LOVES Wooden Canoes
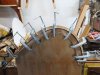
After having been exposed to the wisdom of this forum, I have decided that I should not proceed with my plan to epoxy the tack holes and outer stem rivet holes. The new plan is to insert new spruce, about 3/8th thick, in the carved out space at the outside of the inner stems. I didn't get pics of the as-found stem, but there were many,many tack holes.
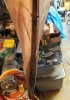
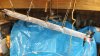
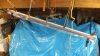
I have a piece of sitka spruce with about 30 per inch ring count, that I plan to steam to fit.
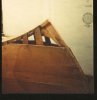
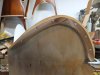
Here's the carved forward inner stem.
I have a piece of sitka spruce with about 30 per inch ring count, that I plan to steam to fit.
Here's the carved forward inner stem.