You are using an out of date browser. It may not display this or other websites correctly.
You should upgrade or use an alternative browser.
You should upgrade or use an alternative browser.
Stem Repair and Otca Restoration
- Thread starter Mud Bug
- Start date
Worth Gretter
LOVES Wooden Canoes
a deep appreciation for the amazing work some of you fellows do
Your boat looks good! And yes, this group will keep you (and me!) humble because of the amazing work.
Michael Grace
Lifetime Member
how in the WORLD do you get these things clean for varnishing?
I'm sure lots of other folks do the same as I do. Four part answer: (1) stripping, cleaning, sanding, (2) paying careful attention to hidden areas, (3) ensuring the hull is clean before varnishing, and (4) working in a clean environment.
I'll sometimes do a light sanding and re-varnish, but most often I'm varnishing a hull that I stripped, cleaned/bleached, and then sanded carefully. That whole process gets the old stuff out - it gets everything out. Well, all but those nasties that can still lurk in hidden places, so I pay careful attention to the undersides of the inwales, underneath the decks, and the inner surfaces of the gunwales - the spaces between the ribs in an open-gunwale canoe. The undersides of the rails and decks can trap a lot of stuff even after stripping and all. Same for the inside edges of the inwales. I sand these spaces carefully and thoroughly, even though mostly they will never be seen. For the inside edges of gunwales, the spaces between ribs, I sand with sandpaper folded around a thin but stiff piece of wood.
After all this I vacuum very carefully including all those hard-to-reach places, using a strong vacuum, a horsehair bristle attachment to get junk moving, and a narrow nozzle attachment for narrow spaces, and even a toothbrush to help ensure stuff is loosened up from the tight spots. Then the tack cloth. I've heard people swear off tack cloths, but they are an absolute must for me. A quality tack cloth used properly won't leave behind problematic residue, yet it will get a surprising amount of leftover stuff off the wood. You know this because even after careful vacuuming, the tack cloth comes up dirty, often filthy, with dust and sometimes bits of detritus. Quality tack cloth... I've bought tack cloths off the shelf at home centers and hardware stores, and they were horrible. I get quality ones from places like Jamestown Distributors.
Finally, varnish in a clean location. There are different levels of clean, but you know clean when you see it. If things can fall off trees or roofs, cats are wandering around, active lawnmowers are nearby, wind is blowing, etc... not good! Even indoors rooms can be filled with dust. Start with the cleanest place possible, and from there you can build tents, wet down floors, install air cleaners, and so on to be as clean as you like.
But all of this is aimed at a very clean, high-quality finish, which I think is what your question was about. What is required, though, is a good finish that protects the wood. Even if you have dust and other bits embedded in your varnish, as long as the varnish is well adhered and built up sufficiently, it should do its job just fine. As was already mentioned, your photo makes it look like you're doing a good job of protecting your hull from the ravages of water and sun.
Last edited:
Dave Osborn
LIFE MEMBER
After vacuuming I use a tack cloth to get it clean for varnishing.
OP
OP
Mud Bug
Hand made things are better
Wow Michael, thank you for taking the time to write all that. I sure don't have a clean environment right now. Best I can do is outside, then back in the barn before a rain. I varnished this a bit earlier than I wanted to because after I sanded it and vacuumed it cleanish (!) I kept getting bat droppings all over it coming down from the little buggers' sleepy places under the hip roof. ARGH! So I went ahead and sealed it to protect the wood from little black oval stains. (Gotta remember we like our squeaky little bats for mosquitos, right?) So outside is my cleanest space. At least I don't own a lawn mower. I hate those things.
That brings up my first question: bleach. Was I supposed to bleach it? It seems like I mighta read about that here somewhere, but it didn't sink in. There are blacker patches and streaks on the wood from water staining. Would bleach have gotten rid of those? Does bleach affect the natural wood color? Does it need to be neutralized like a strong base or acid does? And do you use household variety, laundry bleach? It's too late for this one, but I'm hoping to redo my Bob's Special if I feel confident after this practice run. That "if" is getting bigger all the time though, what with all I'm learning I don't know.
What in the world is a "tack cloth?" Never heard of that one.
I don't have a horse hair brush for a shop vac. That does sound awful useful. I'll ask Mike at the hardware. If he can't get one I expect I could duct tape a cheap paint brush to the end of the hose. Wish I'd thoughta that.
Thanks again everybody.
Mud
Michael Grace
Lifetime Member
You're very welcome, Mud.
Cleaning/bleaching - search here and you'll find more, but in short, there are products sold as two-part teak cleaner and bleach. Similar versions are made for decks. The good stuff comes from marine dealers. Popular brands that work very well are "Te-Ka" and "Snappy Teak-Nu." Part 1 is a strong base and it is neutralized with Part 2, an equally strong acid. They make old wood look gorgeous again. Beware of household bleach. It is a very different thing (it is sodium hypochlorite) and it makes old wood look way too blonde, at least in my opinion. Here is the TotalBoat version which I haven't tried but their products seem to be great based on those I've tried:
A tack cloth is a resin-impregnated cloth that is wadded up and lightly (very lightly!) wiped over the surface of the wood. It is sticky and picks up stuff left behind after vacuuming. A poor quality tack cloth is gummy, but any tack cloth scrubbed on the wood will leave a residue behind that can interfere with finishing. Hence using it "very lightly." Here is a product I have good luck with:
https://www.jamestowndistributors.com/product/product-detail/4045
About the vacuum brush, you could also just use a clean, dry paint brush and work it over the surface right at you vacuum nozzle. You just want to get things loosened up to increase the chance that the vacuum will suck them up. And a strong shop-vac really helps. I use these "horsehair" brushes and they have been great (and SO much cheaper and SO much better than the horrible plastic-bristled brushes sold at the big box stores). I thought they might be real horsehair but the listing says they're not. The bristles are very soft, though, so they get into the tiny spaces that need attention. The ones from my home centers are stiff and so relatively inflexible.
Last edited:
Dan Lindberg
Ex Wood Hoarder
Mud -
If you want to elevate your finish work, get a book called "Brightwork" by R Whitman (I think this is right), that will cover everything you will need.
Then, some folks are known to make temporary "paint booths" out of thin plastic sheet, 4 walls and a ceiling and wet the floor and you should be good to go - and NO air movement (unless you have a filter system).
Dan
when I do seat frames, decks and thwarts, I do them in the basement and rotate them to prevent runs. Once they have 4-6 coats, they are ready for re-installing and final coats on the canoe.
Michael Grace
Lifetime Member
Dan is spot on - Rebecca Whitman's book is excellent. Hopefully it's still in print. Try the WoodenBoat store or Amazon; otherwise Ebay? It's not only a great primer on finishing, but it's also filled with gorgeous photos of beautiful wooden boats. This is my copy, photographed tonight in a beautiful wooden boat!

Last edited:
OP
OP
Mud Bug
Hand made things are better
Wow, Michael, that is very helpful. Thank you! I had no idea there were special bleaches for wood. (I'm just chuck full of no ideas.) I'll see about getting a brush for my wife's shop vac. Hopefully there's one her size. When I followed the link to the tack cloth the description said it was cheesecloth impregnated with a bit of varnish. Hmm... My sweetie makes a lot of cheese from our milk; maybe I could borrow some and make my own version.
Dan and Michael: I will try to get a copy of that book. I like a real library. Most of my books are about history, art or iron. I need to start a wood section. When my dad went to college in the 50's he took a class dedicated to finishing wood. When I went to the same college, same curriculum in the 90's there was no such class. I've always felt shorted. High time to turn that around. Thanks guys.
Now Dan, you raised a question I was gonna ask: How do I know when there's enough finish? You said four to six coats?! I was thinking two coats--and three would be getting kinda thick. But yesterday when I took a good look at my 2nd coat I noticed there were areas on the ribs where the finish was more flat than others. I thought at first that was from my bad application, a contaminated brush, dew on it before it dried or some other mystery, but now you have me wondering if it just needed more coats. How do I know when to quit? (Okay, Mud, buy that BOOK!)
Dan Lindberg
Ex Wood Hoarder
For me it's when I get sick of putting it on.
But - my opinion - the parts of a canoe that most people see 1st and pay the most attention to are the 1 - decks and 2 - the thwarts, followed by the seat frames and rails (gunwales). So on my canoes, I spend more time making the decks and thwarts "perfect".
As I said, I do these in the basement using the Jenn Wen foam brushes, over and over until they look perfect.
Mean while, I finish the rails (2-4 coats) off the canoe and put 2-4 or more coats on the ribs/planking.
When all this is done, the decks, seat, yoke, rails and thwarts go in,
and to finish it off, the rails and decks get the final coats until they are as nice as I can make them.
You didn't ask but the paint gets similar treatment - prep the canvas as you like, then 3-4 coats of marine enamel (wet sanding between coats), I use 2 brushes and do each half for the canoe separately, starting with a fresh brush . IMO, the brush gets too loaded up and doesn't flow well after about the length of a canoe.
Dan
note - I don't do this to sell a canoes, I only restore canoes that I am interested in keeping.
How do I know when to quit?
OP
OP
Mud Bug
Hand made things are better
That's a good quitting point, Dan. But I'm to the point where I wanna quit because it's looking so awful. This Man o War is thick, gloopy stuff. I feel like I'm smearing it on more than brushing it in, and reaching back just four ribs to touch it up is impossible, because it's already tacky. The can says not to thin it. I have an unopened can of Rustoleum Marine spar varnish, and it says the same thing. You agree with that? Or are they just trying to sell more goop? (I mighta missed this subject somewhere when my pointy little brain was zeroed in on some other minute question.)
All the surfaces are getting rough as all get out. Very frustrating. I sanded the gunwales and thwarts smoothish again with "fine" emery and gave them another coat. This time I used a rag and rubbed it on instead brushing it. It's somewhat smoother, but I'm still not exactly tickled. This stuff is not laying flat as it cures like I would expect a finish to do.
I finish my ironwork with varnish, but it's much thinner. (If anyone cares, I used to use Formby's Tung Oil until they went away; now I'm using teak oil.) I spray it on, and it lays flat. I don't think this stuff would spray without being thinned. I don't have compressed air at my house to spray anyway, but if spraying's something to consider down the road, I'd like to know. Any thoughts?
When I opened the can from the day before a thick rubber film already had already formed on top. So then I got rubber globs in the already thick finish. Double crud. When I'm finished using varnish or paint at the shop I turn the wire feed on my mig welder down, point the tip into the can (without a ground!) and squirt argon into it. Then it keeps. What do you guys do?
This wood finishing bit sure has its share of problems.
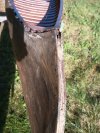
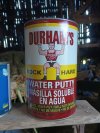
Now a different question: Years in the past someone recanvassed this and filled the stems' gaps with some kind of filler. I can see how that'll be important so every third tack doesn't land in a void. The stem opposite my board splice has some rot, but I don't think it's bad enough to replace (and get my hands slapped all over again") ) because it's still solid to the deck. I'd like to fill that area too. I picked up some wood putty from the hardware: "Durham's Rock Hard water putty." Has anyone used this? Does it work? Are there better solutions? How about mixing Titebond glue with sawdust and making my own filler? Does that work?
) because it's still solid to the deck. I'd like to fill that area too. I picked up some wood putty from the hardware: "Durham's Rock Hard water putty." Has anyone used this? Does it work? Are there better solutions? How about mixing Titebond glue with sawdust and making my own filler? Does that work?
All the surfaces are getting rough as all get out. Very frustrating. I sanded the gunwales and thwarts smoothish again with "fine" emery and gave them another coat. This time I used a rag and rubbed it on instead brushing it. It's somewhat smoother, but I'm still not exactly tickled. This stuff is not laying flat as it cures like I would expect a finish to do.
I finish my ironwork with varnish, but it's much thinner. (If anyone cares, I used to use Formby's Tung Oil until they went away; now I'm using teak oil.) I spray it on, and it lays flat. I don't think this stuff would spray without being thinned. I don't have compressed air at my house to spray anyway, but if spraying's something to consider down the road, I'd like to know. Any thoughts?
When I opened the can from the day before a thick rubber film already had already formed on top. So then I got rubber globs in the already thick finish. Double crud. When I'm finished using varnish or paint at the shop I turn the wire feed on my mig welder down, point the tip into the can (without a ground!) and squirt argon into it. Then it keeps. What do you guys do?
This wood finishing bit sure has its share of problems.
Now a different question: Years in the past someone recanvassed this and filled the stems' gaps with some kind of filler. I can see how that'll be important so every third tack doesn't land in a void. The stem opposite my board splice has some rot, but I don't think it's bad enough to replace (and get my hands slapped all over again
) because it's still solid to the deck. I'd like to fill that area too. I picked up some wood putty from the hardware: "Durham's Rock Hard water putty." Has anyone used this? Does it work? Are there better solutions? How about mixing Titebond glue with sawdust and making my own filler? Does that work?Attachments
Michael Grace
Lifetime Member
HI Mud,
I'm not sure about all the filling, etc., but as for the finishing, here's another plug for Rebecca Whitman's book. It goes through all the details in a very easy-to-read manner. In short, start with a quality surface, as clean and smooth as possible. Best, this means complete stripping and cleaning of the wood, then careful sanding with appropriate grits and backing blocks to get surfaces smooth and scratch-free. If the old finish is good (of course you never know until it fails), you can sand it properly and use that as a base. As we discussed before, clean, clean, clean. Not dust, grass, etc. (and watch out for your own hair, sweat, and lint falling onto the surfaces!).
Once this is done, use quality marine varnishes. They cost more initially, but in the long run they pay for themselves in quality and time saved. They are designed for this work. They have proper UV shields, they are designed to flow out well, and more. A quality marine varnish (I've used a variety of varnishes from Petit, Interlux, Epifanes and others, and prefer Epifanes traditional marine varnishes) will tell you to thin the first coat about 1:1, then less thinner and more varnish as you build up successive coats. With this method, you could get by with four coats more or less, but often people will put on more, sometimes many more. For a great finish, build up and then sand down flat with backer blocks to get a really smooth result. Ideally, you want your sanding to the level the finish (just like leveling paint), ideally to the point that the block-sanded surfaces is completely uniform and flat in appearance - this means that there are no shiny spots remaining - before adding the next coat. This is rarely achieved in old cedar-canvas canoes because surfaces are so irregular (ribs/planking, and the inevitable lumps, bumps, and waves that come from years of abuse), but you might be surprised at how nice they can turn out with patience, good technique, and quality materials.
Note that the early builders often put only a couple of coats of varnish on their canoes, sometimes over shellac. They were trying to get things out for sale quickly and with good profit margins. Plus new wood takes varnish better. An old canoe being restored just soaks up the initial coats. A quality finish on old wood requires more coats and it requires diligence in cleanliness, build-up, and sanding.
By the way, on thinners, good marine varnishes strongly recommend their own proprietary thinners, which are also more costly than off-the-shelf paint thinner. Maybe anything will work, but if you really want to do it right, why risk it? You can be assured that the matching thinner will work properly. I do believe that significant chemical research goes into the formulation of quality thinners, in part because different varnish products from the same manufacturer can call for different thinners.
One more thing - use quality brushes. This probably doesn't need to be said, but a poor or dirty brush will ruin a finish because your varnish flows over and through the brush before it gets to the wood. Good brushes don't have to be expensive; even a quality foam brushes work very well for varnish. And note that even foam brushes come in very different qualities (the Jenn brand is high quality).
Finally, with any brushes and any varnishes, you need to get used to how they operate. Pay attention to how the varnish flows, how quickly it sets up, how well it tolerates re-brushing, how varnish flows from the brush, etc. Understanding the tools (brush, varnish, tack cloths, sandpaper, etc.) in your own hands is key to quality work.
Hope this helps. Get Whitman's "Brightwork" - it's excellent.
Michael
Last edited:
So, where are you located MB. I would spend time with you if we are close . I am in Rochester NY. If we cannot get together, I would suggest you search the forums for two submissions Pam Wedd provided for those who wish to take a little more time to get excellent results in their varnish and paint finishes. Pam is the owner of Bearwood Canoe Co. in Seguin , Ontario. Her finishes are tough to match but you only have to come close. I know , I have tried.
Good luck and Have Fun.
Dave DeVivo
Good luck and Have Fun.
Dave DeVivo
OP
OP
Mud Bug
Hand made things are better
Gee, I thought I was using a quality marine varnish. Somewhere in the long list of words on this site I thought I'd read a recommendation for Man o War, but now I can't seem to find it even with my speed reading on warp drive. Thanks for your reply and time sharing good information. What sinks into my brain so far from what you said is 1:1. I think I blew it. Shucks. Well, this is my test run to see if I'm qualified to do my Bob's Special.
Dave, I'm in Michigan, east of Quincy, due north of the Indiana/Ohio state line about 15 miles into Michigan. I sincerely appreciate the invitation. I'd love to see your process, your place and your canoe(s), but unfortunately New York's a haul. If you ever come west down 80/90, you'll be about 20 minutes away, and you'd be welcome to stop in. I could show you my blacksmith shop too if that or line shafts are appealing to you. (90 feet of line shaft, power hammers, machine tools, dynamo etc. run by an engine built in 1898.) But right now my canoe space is extraordinarily humble--and so are my skills.
Dave, I'm in Michigan, east of Quincy, due north of the Indiana/Ohio state line about 15 miles into Michigan. I sincerely appreciate the invitation. I'd love to see your process, your place and your canoe(s), but unfortunately New York's a haul. If you ever come west down 80/90, you'll be about 20 minutes away, and you'd be welcome to stop in. I could show you my blacksmith shop too if that or line shafts are appealing to you. (90 feet of line shaft, power hammers, machine tools, dynamo etc. run by an engine built in 1898.) But right now my canoe space is extraordinarily humble--and so are my skills.
Dan Lindberg
Ex Wood Hoarder
Interesting - my only experience with Man-O-War is that it was thin and runny. I don't use it.
I've tried Epifanes and Captains but generally stick to Interlux - I like the way it goes on, how it looks and most of all smells.
I've had bad luck with water putty, (other jobs) and would never put in on a canoe.
MI - check out the MI Chapter of the WCHA, and go to the Quiet Water gathering they have each spring(?).
And you are just a bit North of Gil Cramer (The Wooden Boat Shop), and stop in to see him might be interesting.
Last edited:
Worth Gretter
LOVES Wooden Canoes
Mud, you mention using Titebond glue mixed with sawdust as a filler. I have done that for small areas and it worked fine.
For bigger areas, I tried epoxy but it was too hard. Even with West System Gflex 650 epoxy and their 410 Microlight filler, it was still a lot stronger than I wanted. I felt that it would be hard to sand and hard to remove if I ever needed to.
So I experimented with solvents to "stretch" the mix, i.e. more filler and less epoxy. I wound up using lacquer thinner. The results are at this thread: Filler
As mentioned in the thread, there are two things to be aware of:
1) The filler mix will begin to thicken in the pot. This may seem like the epoxy reaching its pot life, but it is actually the solvent evaporating. Simply add more solvent to restore the consistency.
2) The filler shrinks when dry, unlike pure epoxy.You can fill too high and sand more later, or else fill a second time.
But the end result is what I wanted, i.e. an epoxy filler that was not quite so strong.
Dave Osborn
LIFE MEMBER
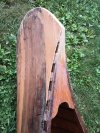
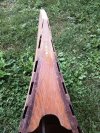
Your stem doesn’t look too bad to me other than on the tip. Is it rot? If so, now is the time to fix it.
You may be thinking that a coat or two of varnish is going to look nice. It doesn’t, even with good varnish. It’s a process.
Sand your ribs smooth with 220 or 320 grit and apply 4 coats, sanding between coats. It get better each coat. Unless you are using Epifanes Woodfinish Gloss (Recommended). Then there is no sanding between coats.
MGC
Scrapmaker
It is worth noting that a good pair of beer goggles can significantly reduce restoration effort. I'm currently heading to the Augustiner Keller to conduct some further research but I suspect that two coats of Man of War would suffice following Zwei order Drei mass.
I believe that my Chestnut came from the factory with only two coats of varnish.
You can tell by looking at it...it's simply not enough.
I believe that my Chestnut came from the factory with only two coats of varnish.
You can tell by looking at it...it's simply not enough.
OP
OP
Mud Bug
Hand made things are better
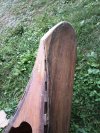
Here are pictures of how my stem repair's turning out. I haven't varnished it yet, and it'll blend better after I do. And the two brass screws will be covered by the copper band thingy. I could have taken a bit more of the deck away and replaced it with the board, but I didn't because my board wasn't thick enough to go much wider. It's good enough to float me down the river. Remember this is a yard repair by a guy with very few tools.
Say, do any of you fellas date your repairs? I wrote my name, my town and the year on the board I added. It's covered by the planking now, but if someone goes that deep they'll see it. I wonder when that'll be?
Say, do any of you fellas date your repairs? I wrote my name, my town and the year on the board I added. It's covered by the planking now, but if someone goes that deep they'll see it. I wonder when that'll be?
Attachments
Last edited:
Worth Gretter
LOVES Wooden Canoes
Looks good! I was planning to sign my planking before covering it but completely forgot!
Similar threads
- Replies
- 6
- Views
- 3K