Dime size hole

Tom Widney

LOVES Wooden Canoes
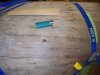
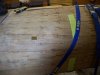
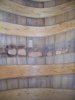
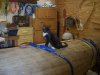
While removing a buried tack head as I was replacing a rib, a dime size hole was created in the planking. The hole is not particularly round and lies directly under and will be completly covered by the new rib.

Any ideas or thoughts of how to proceed, short of replacing the planking?

It had crossed my mind to use the West System epoxy with the tan sandable micro balloons... placing a piece of tape over the hole on the interior of the canoe to give the mixture a smooth level backing until it sets up.

I'm sure this has happened to others so you all may have a superior solution to the small area of epoxy which probably wouldn't expand/shrink in harmony with the red cedar planking.

Its a 61 OT Guide

Thanks,
Tom
 
You could.....although as you've already figured out, a thin hunk of cedar and a hard chunk of micro-balloon-filled epoxy don't really have a lot in common and may not get along and play nice forever in this context. Probably the best solution from a number of perspectives would be a little dutchman. Rather than being a short person from Holland, this would be a rectangular cedar patch with beveled edges that's been edge-glued into a hole with mating beveled edges. First, you clean up the hole, beveling it's edges, then you take a little piece of cedar and trim and bevel it a little bit at a time until it fits neatly. Glue it in (slightly thickened epoxy is probably the best bet for this, but most waterproof glues would work) let it dry and sand it fair and smooth.

Tedious? Maybe a bit, but there is a certain satisfaction in classy craftsmanship (even if it's hidden) which most of the folks on this forum understand quite well. A dutchman is the traditional, time-honored marine method for replacing small defects and little ones in cedar don't really take very long to make and install. Plus, the best patch on any piece of wood with a hole in it is almost always another piece of wood, as it will have similar physical characteristics.
 
Thanks Todd,

I'm not surprised at your answer, a little more work but thats how it works out most times. I'll get out the whittling blades and get to it, thanks for taking the time to answer.
Tom
 
Dutchman installed

Todd,

I used your advice and made and installed the little plug as you suggested, it worked out well and passed Carson’s approval who supervised the entire process.

I have had them installed for quite a while, but just tonight learned that I can resize my photos quite easily with paint!

Thanks for the advice Todd,
Tom
 

Attachments

  • wcha original hole sm.jpg
    wcha original hole sm.jpg
    414.2 KB · Views: 270
  • wcha hole sm.jpg
    wcha hole sm.jpg
    225.1 KB · Views: 252
  • wcha bending sm.jpg
    wcha bending sm.jpg
    207.7 KB · Views: 225
  • wcha end 1 sm.jpg
    wcha end 1 sm.jpg
    181.2 KB · Views: 269
  • wcha carson super sm.jpg
    wcha carson super sm.jpg
    355.2 KB · Views: 254
Tom,

The repair looks good, and now that you have it finished, here's what I do with holes like that.

I extend the ends of your dutchmen to under the closest ribs, and I don't glue it, I just tack it.

The only visable seam is a straight line between the 2 ribs, and I usually match the color and grain using old planking that was removed (or saved) from another area. If I do it right, the patch is invisable.

Dan
 
Back
Top