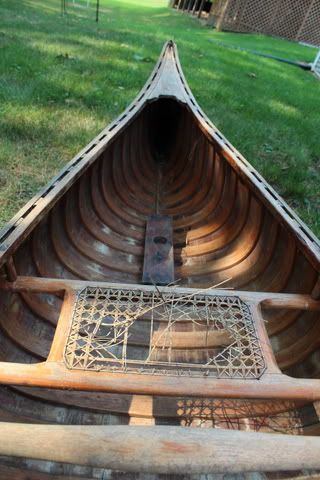
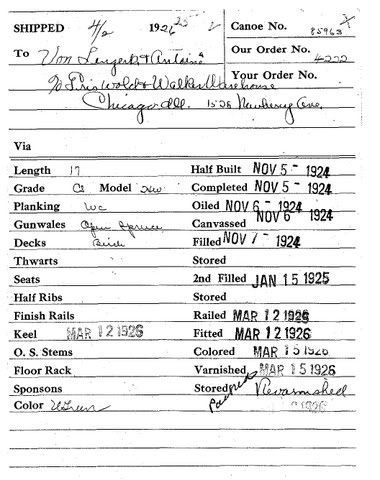
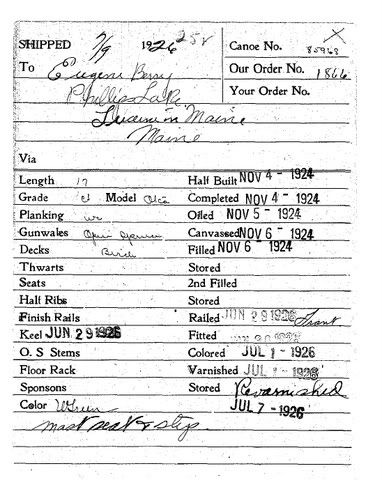
What to do with this 1926 OT HW

My heat gun is a regular Sears Roebuck version with two settings and works fine. I get it just hot enough to have the resin let loose. Don't tell anyone but before the heat gun I used a propane torch.
 

Attachments

  • IMG_6359.JPG
    IMG_6359.JPG
    208.8 KB · Views: 394
Tedious job, eh? From here it looks like you did well!

Did you strip the glass off with the outwales still on? There may be glass underneath the outwales...
 
It took about six total hours of work. It could have been much worse. In some places the glass came off in sheets, as though it was barely adhered to the planks. In most places it was tedious, but very doable.

Yes, I left the outwales on at this point, knowing that I'd have to take them off. I was concerned that if I removed them 1) the canoe would start to spring open or lose its shape, and 2) the top of the planks might get damaged if they sat on the saw horses for extended time. There is glass under the outwales.

I need to get that book on the restoration of the wooden canoe and read up on the next steps. I may be able to work on it this weekend. I want to have the glass all cleaned off when Dave comes through this area in November to share some advice on planks, ribs.
 
Do you think I have an HW or an OTCA model here?
The invoices point me to the HW, and the mast seat makes me think it's an otca. Any ideas?

IMG_3855-1.jpg

IMG_3862-1.jpg

0038TIF.jpg

0033TIF.jpg
 
Can I take the outwales off (in order to removed the last bit of fiberglass) without the shape or integrity of the canoe changing?
 
I think it's HW. otca's had round decks with combings, I think, but I'm not 100%. Sure remove the outwales. Outwale removal is the first thing I do. the shape can change when the thwarts are removed so keep it in place with strings or thwarts or temp thwarts or clamps.
 
What Dave Wermuth said......HW
Ok to remove outwales. Leave thwarts or rig up temporary ones.....
See you in Nov.
Dave
 
Outwales came off nicely today. I see that one must have broke years ago and it was repaired with two small brass screws from the bottom up. But the break was almost in a scarf shape. Will have to see what to do with that later. I cleaned them up and sneaked them into the family room downstairs for safe keeping, as I fear they would be broken in the garage or under the deck. They're kind of hard to hide, though.

Thanks for the declaration that it is an HW. Someone must have added the mast seat afterward.

I bought stripper and some chemical gloves today.
 
Thanks for the declaration that it is an HW. Someone must have added the mast seat afterward.

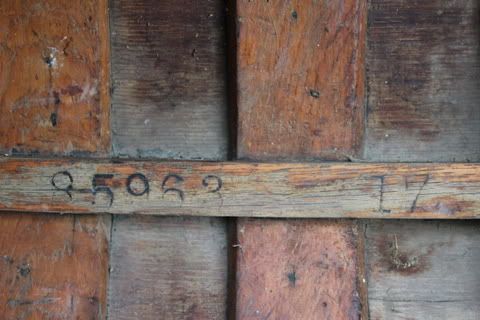
HW. Deck cutout is typical. Later Otcas have deck cutout similar (not same), but from this era an Otca deck is longer with coaming as Dave W. said. And your number is without a doubt 85963.

Your canoe has a mast step but no mast seat. A mast seat is the bow seat made with wider forward member with a hole fitted with a brass ring for the mast to pass through. The thing in the floor is a home-made mast step. A factory mast step from this era looks very different (fancier shape and square hole for a square-footed mast).
 
There are many confusing terms related to sailing canoes. Dan's guide at http://dragonflycanoe.com/otacc/ may help if you want to identify the components necessary to sail yours again. The pictures below show the later version of an Old Town mast step in more detail.

Benson
 

Attachments

  • Mast-Step-1.jpg
    Mast-Step-1.jpg
    292.9 KB · Views: 382
  • Mast-Step-2.jpg
    Mast-Step-2.jpg
    269 KB · Views: 389
  • Mast-Step-3.jpg
    Mast-Step-3.jpg
    363.7 KB · Views: 378
  • Mast-Step-4.jpg
    Mast-Step-4.jpg
    200.7 KB · Views: 383
  • Mast-Step-5.jpg
    Mast-Step-5.jpg
    217.1 KB · Views: 415
Stripping

When the temp reached almost 80 yesterday I took a few hours to begin stripping the varnish from the inside. It was windy, so the fumes didn't overtake me. I can see that I'll need to open up the ends in order to get it completely clean under the decks.
IMG_6736.JPG
IMG_6737.JPG

I tried to remove the homemade mast step, but couldn't get the screws to budge before the heads started to strip.

The seats are sound, except that they need to be re-caned.

I'm going to shop for a tack puller next.
 
There are a few tricks that can help loosen old, frozen screws. One thing to try is to heat the screw using a soldering iron. Sometimes the screw is frozen/corroded by varnish/glue/miscellaneous gunk that heat will melt or loosen. Another is to place the screwdriver in the slot, and rap it sharply – the shock can help break the bond. Sometimes tightening the screw (just a bit) will break the bond, after which the screw may back out easily. Of course, make sure the screwdriver is the right size for the slot – not too big, or it will not seat all the way down into the slot, and not to small -- no play allowed – or the screwdriver will cam out and destroy the slot and the head.

If these things do not loosen the screw, you are in for a bit more trouble – so try them first.

Also, the mast step could simply be split away from the screws with a chisel, and a vise grip will grab the screws so you can turn them out. This may be the easiest way -- if you don't want a mast step, there is no loss, since the one you have does not appear to be original. If you do want one, a new mast step is easily fabricated and installed.
 
Last edited:
What Greg said in his last suggestion. You can probably just chisel off the to 1/4 inch and grab the heads. Or drill the head of the screw off and pull it out. The remaining screw shanks will come out when coaxed with a vise-grip.
Opening the ends is a good idea for stripping under the decks. Especially if you have to remove the decks to do inwale repairs...

I'll be on your doorstep before you know it!
dave
 
Greg and Dave, thanks. Don't know why I didn't think of chiseling the step out (I didn't want to keep it).

The deer are moving, and are hopefully waiting for you. An acquaintance got a small buck this morning with his bow. Field dressed 140lbs.
 
Back
Top