stripper planking

adkrover

Curious about Wooden Canoes
I'm working on building my first stripper canoe. It is a small wee lassie type (modified). Istarted my planking by laying a first plank at the gunnl at mid boat and layed in over the forms where it wanted to lay without contorting it. All was well until I got up to the curve of the canoe. The further I went along the more I had to contort the planks at the ends to get them to follow the previous plank. To the point it is very difficult to get the plank to lay flat on forms. I'm thinking it's my design but not sure. I have some GRB strippers and they change the planking on the bottom to all follow the keel line. This is what I am doing, does anyone see any issues with this approach. PC182111.jpg
 
I'm not sure what you consider "issues" but what I do see are a lot of places where the strips are misaligned, with edges sticking out that will have to be sanded down. This will make thin and uneven spots in your wooden core. There is also some very funky lengthwise curvy stuff going on along the edge of the current stripping area that shouldn't be happening. What are you using for instruction? You may need to stop stripping, trim the edge along the turn of the bilge into some sort of smooth curve and then start stripping again up against that edge to fill in the rest of the bottom.

Building strippers isn't really difficult, but it is a test to see how well folks follow directions - and high quality directions are readily available. Failure to do so can get you into all sorts of problems.
 
Thanks, your seeing exactly the issues I'm having. I was needing to contort the planks so much I couldn't keep planks aligned, staples were not doing it. Not sure about what you see as "funky curvy stuff". I did switch from bow-stern planks to longitudinal planks that I am fitting to last bow-stern plank. The book I am using is Canoecraft. Not a lot of instruction there , think it said continue planking but no references on issues such as this, potential troubles....
I am able to maintain much better alignment now that I switched to longitudinal planks / parallel to keel line.
 
Hi adKrover
Looks to me as though your modifications may be causing the problem.Your design seems to have a very quick turn so the planks are very twisted in order to conform to the shape.Did you check your jig with by putting a plank on it and fairing the forms?This may have helped.
Also you could try soaking and heating the planks with a paint stripping gun to bend them to shape on the jig temporarily fitting until they cool and dry and then glueing them when dry.Unfortunately you have all ready fitted some without doing this.
Ultimately you will just have more filling of gaps in planking to do and you will have to fair and sand your boat with more care but it will still float.
Cheater planks are often added to ease planking and I believe this is mentioned in earlier versions of canoe craft but perhaps not in the later ones.
Good luck
Enjoy your build :)
Alick

One final thought.You could make up a few 1/2 inch wide planks instead of 3/4 for the tight areas.....
 
Last edited:
Alickg, your thinking exactly what I am. The problem is with turn at bow/stern. I was thinking about steaming planks also/ Instead a altered from what I see on most canoes and started running planks parallel to keel (Grasse river Boatworks did this on their classic strippers). This has helped a lot so far, but I have not got to the ends yet and may have to resort to steaming when I do. When I started this canoe I wanted it to be a practice /learning canoe. I have glued in tapered wood filler strips anywhere over a 1/2 a plank is offset to reduce any real thin spots. You can see a little of this if you look close, mostly where the planks make the turn after the flatter middle section. I did fair my hull on the drawing board with some thin strips both on butts and Water lines. In hindsight I should have done it with the forms/planks. This would have caught a few issues I'm having. In the end Patches (what I'm naming it) will probably float just fine.
 
Yes ! Several things are totally wrong by usual stripping methods.
1 The Wee Lassie is a tough boat to strip, but you can do it.
2 You didn't follow Canoecraft. Did you bead and cove your strips ?
3 Should have started at the shear, and stayed with it.
4.There is a method called the herringbone pattern. The strips are joined at the middle . Thus strips that are half the length of the canoe can be used. Trying doing a search.

Now what you really want to know, is can you finish this canoe, without tearing it apart ? Yes. It will take you longer, but you will get there ! You will become an expert at fitting strips, by the time you are done ! Don't give up! Many builders go with totally off the wall stripping methods. Some turn out great, some don't. They all float.
The wood in a stripper is just a form ! The fiberglass will give it the strength. If you have a very thin hull, put two layers of cloth on the bottom.

The Wee Lassie, is in my opinion, one of the best canoes out there ! It is sea worthy, and a joy to paddle. Double blade or single. I've built several over the years, and plan to build another soon

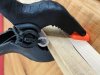
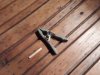
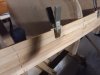
The Lassie requires some tough twisting of the strips. Look for ways to hold the strips in place. Staples, clamps, nails if you have to. Some use a heat gun to help twist strips. I haven't done this, try on some scrap first, if you want to try it. Once you have covered the stem forms, usually it gets easier. Maybe not with your current approach. But stay at it !
Don't give up !

Jim
 
Adkrover

A few questions, after looking closer at your pic.
What width are your strips ? 1/4"x ? ? 1/4"x 5/8" strips work around the bilge a lot easier than wider strips !
What modifications did you do to the forms.

Lastly, Bead and Coving your strips would be a great help ! If at all possible !

http://i1272.photobucket.com/albums/y390/JimDodd/IMG_0991_zpste1o1oph.jpg

This is a stemless Lassie type build. Stemless is every bit as strong, and a lot easier to build.

Expand your knowledge, by picking up some new books.One, that has come to light is Canoe Building, by Susan Van Leuven. She has building options, that allow the builder to make thier own choices. Plus she built a Wee Lassie.

Good luck !

Jim
 
Based on just that image, I don't see any areas that should be hard to strip.

What I do think I see is a very unfair hull.
If it were mine, I'd scrap the existing strips and spend more time fairing the sections.

I'd also use a lot more clamps to keep the strips in alignment, don't be in a hurry, and make sure the glue on each strip it dry before adding the next strip.

Do what you need to do to keep the strips in place. Here are a few images of tough strips.

Dan

PC290223.jpg PC290217.jpg PC290220a.JPG PC290222a.JPG PC290223.jpg
 
Last edited:
I read this post with interest. I have the molds for a Wee Too by Laughing Loon ready to go and should be stripping my first canoe shortly. While playing around with some strips I noticed that this canoe will have some tough curves also. Have I picked too tough a design for my first build? I notice that the strips on the second and third stations from the bow and stern do not sit flush to my stations, which are 1/2" birch plywood, but at a slight angle should they sit flush(90*)?
My strips are Bead and cove, 3/16 thick and 1/2", 3/4 and 5/8. I know that the first strip is the most critical but what I am struggling with is to I bend the strip to the molds at the shear line or let it follow the natural flow that it wants to then use cheater strips on the bow and stern. Which is easier for this novice?
 
This is a short reply, as I have to leave.
It's normal for the strip to just contact the form on the edge, as your picture shows.
Do a double check on you spacings.

Let the fairing strip be your guide.

And Yes the Wee Too looks to be a bugger to strip !

Jim
 
How you layout the strips "should" be based on how you what the canoe to look.
And this decision is just one of many you need to make what you are planning your build.
To me, ease or difficulty of laying a strip has nothing to do with how I lay the strips.
Look at the pics I posted above, with some of those strips it was 1 per night.
Building a canoe is not a race.

Dan

"but what I am struggling with is to I bend the strip to the molds at the shear line or let it follow the natural flow that it wants to then use cheater strips on the bow and stern. Which is easier for this novice?"
 
Jim and Dan thanks for the response. My spacings are exact. As to let the fairing strip to be the guide I believe this is the way I will go making sure both sides are level and flowing. Meaning I will have to do some cheaters later, which from what I've read and seen will give me a attractive craft. I have ordered the strips from totem strip for this first one. Peter there has worked with others there building a Wee Too and has suggested a thinner strip around the bilge to help with the bends and twists. He suggested even wetting the strip clamping it glueless and then coming back and glue the next day. WI am fully prepared to glue one or two strips a day if that what it takes. In doing a lot of reading here the common theme is "Don't rush it" and you will enjoy the end result more. It's the response from people like you that will keep me sane through this.
Jim I saw your modified clamp what are your opinions of the clamp I made to replicate it, would you have concerns? I am the grasshopper
 

Attachments

  • Clamp proto.jpg
    Clamp proto.jpg
    112.8 KB · Views: 435
As shown in the 3rd pic, running the strip long to provide a "handle" also helps. Note the c-clamp and string holding the strip in place, along with the poles pushing from the ceiling. This canoe is full length and stapleless, so lots of waiting on glue. Those strips are 3/16.
 
My clamps incorporate a bicycle inner tube.
I'll post a link ! I love them !!!!
Another trick to make stripping easier, is with narrower strips ! My son's Wee Lassie type canoe, went together easier using strips that were 1/4" x 5/8", before they were beaded and coved ! Lassies again are tough to strip, but they are fun to paddle !
We used staples for my son's build ! You have to be inventive to keep the strips on the forms !

Use 1/4" x 1/2" in the bilge area. Yes it will take more strips, but you will have less trouble keeping your strip True to the forms !

Learning to cut your own strips will save you SOOO much money, and give you more control over the outcome !
At the beginning of this link, you will see the clamps in action. I would use the clamps first, and then staple the strips on the forms.

http://www.canoetripping.net/forums.../80801-nokomis-wood-workers-first-canoe-build

How I make them.

http://www.canoetripping.net/forums...ons/diy/77273-new-spring-clamps-for-stripping

Jim
 
I've tried building a canoe by stripping starting at the sheer line and working down and found the same problem of wildly contorted strips near the ends when I got up near the turn of the bilge. I now use the method shown in Canoecraft and the bottom strips come out to a perfect football with no contorted strips.

I've also discovered a simple clamping method to assure perfect hairline joints between stations. I went to Harbor Freight and purchased a dozen small incredibly strong rubber coated C clamps fo $1.99 each. I cut up a 1/4" dowel into 3" pieces. The pictures show how the clamping system works.

After stapling at the stations, position the dowel pieces on the strip between each station and push down forcefully. You'll see the excess glue squeeze out the joint both inside and outside. Wipe off the glue then put the clamps over the dowel, pushing down hard and release the clamps. The clamp ends reach down to the strip beneath, thus holding the new strip in perfect contact with the strip below.

This assumes that you have cove-and-beaded the strips. Don't miss this crucial step, and don't neglect buying. Canoecraft It's the stripper's bible that will solve many problems.
 

Attachments

  • canoe side view.JPG
    canoe side view.JPG
    111.7 KB · Views: 480
  • clamp and dowel close up.jpg
    clamp and dowel close up.jpg
    137.3 KB · Views: 457
  • clamp in place.jpg
    clamp in place.jpg
    105.2 KB · Views: 461
  • clamping system close up.jpg
    clamping system close up.jpg
    110.6 KB · Views: 437
I like the rubber inner tube to both give the clamp arms some friction against the lower strip and to provide a constant tension against the strip.

I first saw the spring clamp/dowel system used by a fellow builder at the canoe museum workshop in Spooner, WI.

http://www.wisconsincanoeheritagemuseum.org

However, his spring clamps weren't strong enough to hold to the lower strip in tight-bend places so I shopped around for stronger small clamps. The ones I found at Harbor freight were amazingly strong and had serrated rubber arm tips to hold the clamps onto the wood anyplace.

BTW, they were the only tools I've ever found at Harbor Freight that weren't made in China and that didn't break about the third time they were used.

Gary
 

Attachments

  • clamping system close up.jpg
    clamping system close up.jpg
    110.6 KB · Views: 421
Back
Top