Michael Grace
Lifetime Member
Craig, everything you described is spot on. From the hidden screws to placement of nails to how the sponsons were built onto the canoe, you're describing the typical Old Town method. Of course you won't be rebuilding from scratch but rather re-attaching. Canvas the canoe, tack on a strip of half-width canvas at the positions of the sponsons, re-attach sponsons, and re-attach. When re-attaching, just put a few screws through the hull and canvas along each side, and use those screws to locate their proper holes in the sponson. After pulling it tight to the hull with those screws, the other screws will find their holes. After stretching the canvas around and attaching at the top outer edge, and neatly closing up the ends, then fill the entire canvas including the sponsons.
About the wooden structure of the sponsons, yes you might need to do some repairs and fairing but there's no need to get them glass-smooth. Just like with the hull, you want everything generally fair, but the canvas and filler will hide minor imperfections.
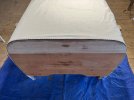
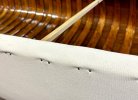
Someone recently advocated for caulking the edges where the sponson meets the hull but as you could tell from dismantling yours, there is no need for this. As long as you do a good filler job, everything will stay watertight. When applying filler, give extra attention to working in into the canvas junction plenty the perimeter of the sponsons, and over the four ends (two ends of each sponson) where the canvas is folded over to close up. The filler will seal the joints and will neaten the appearance of the ends.
This process is well covered in Stelmok and Thurlow's book:
The Wood and Canvas Canoe: A Complete Guide
(https://www.woodencanoe.org/product-page/the-wood-canvas-canoe-a-complete-guide).
There was also a detailed description of sponson attachment and canvassing, with lots of photos, in Wooden Canoe. The story was called "Zen and the Art of Sponsons" (April 2016, vol. 39., no. 2).
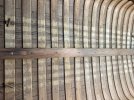
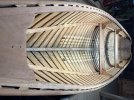
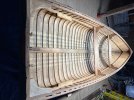
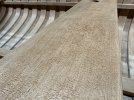
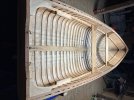
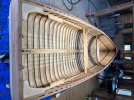
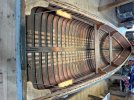
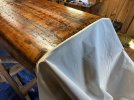
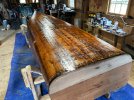
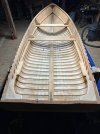
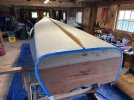
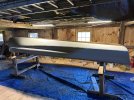
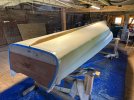
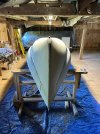
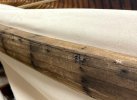
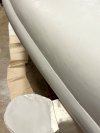
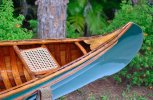
Attached are photos of a sponson job, as described, from a few months ago. In the third image, made after the first coat of filler, note the very narrow gap between part of the sponson edge and hull. Just keep working filler all around the perimeter and into those junctions to ensure a good fill that disappears the junctions.
About the wooden structure of the sponsons, yes you might need to do some repairs and fairing but there's no need to get them glass-smooth. Just like with the hull, you want everything generally fair, but the canvas and filler will hide minor imperfections.
Someone recently advocated for caulking the edges where the sponson meets the hull but as you could tell from dismantling yours, there is no need for this. As long as you do a good filler job, everything will stay watertight. When applying filler, give extra attention to working in into the canvas junction plenty the perimeter of the sponsons, and over the four ends (two ends of each sponson) where the canvas is folded over to close up. The filler will seal the joints and will neaten the appearance of the ends.
This process is well covered in Stelmok and Thurlow's book:
The Wood and Canvas Canoe: A Complete Guide
(https://www.woodencanoe.org/product-page/the-wood-canvas-canoe-a-complete-guide).
There was also a detailed description of sponson attachment and canvassing, with lots of photos, in Wooden Canoe. The story was called "Zen and the Art of Sponsons" (April 2016, vol. 39., no. 2).
Attached are photos of a sponson job, as described, from a few months ago. In the third image, made after the first coat of filler, note the very narrow gap between part of the sponson edge and hull. Just keep working filler all around the perimeter and into those junctions to ensure a good fill that disappears the junctions.
Attachments
Last edited: