How far to slit canvas before tacking to the stem

Dave Aukes

Curious about Wooden Canoes
In Jerry and Rollin's book it mentions locating the notch in the stem where the last full rib passes through and slitting the canvas from the point to the edge. My bow has all full ribs so I'm wondering why it is important to nail in the notch.
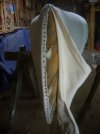
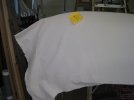
I'm not sure to what point to slit the canvas on this canoe (see photo) Or is this just a "seat of the pants" thing and you do whatever feels right?
 

Attachments

  • IMG_3444.JPG
    IMG_3444.JPG
    86.5 KB · Views: 13
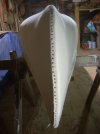
Hi Dave get a black sharpie and I use scissors. Stand facing the bow and/or stern, you'll do both ends. Pull the canvas tight towards you with one hand and then with the other make a dot at the point were the canvas is still touching the hull. Cut back then to this point and you'll be good to go.

If you've got a lot of canvas after removing it from the braces used to stretch it, then cut this back but make sure you give yourself enough to grab and pull with.

As for tacking it, you'll pull both tight over the canoe and still horizontally as you work back from this point to the top of the stem as it meets the deck. I prefer brass tacks others like staples as they tend to make lesser of a hole in the stem. Be sure to leave yourself room for the other side as it overlaps when you put the tacks/staples in the first row. I put a layer of bedding compound between the two layers of canvas others use waterproof glue like Titebond III. Trim the excess canvas off as tight to the stem as you can before doing the second flap. I use a sharp knife and go slowly, especially on the second side as you'll be running the knife along the canvas now. Then once finished doing both sides you'll add more bedding compound/glue to the finished ends. This helps to seal things from water getting in.

Remember you'll be adding a brass stem band which will cover this joint in the canvas so try to not go outside what that covers.

I should have said first that if its an older canoe you'll need to fill the holes in the stem before doing any of this so you have something solid to tack/staple into. I use a two part quick dry epoxy mixing it with sawdust which makes it easier to sand after it sets. A putty knife works this into the holes, cracks etc.

Hope this makes sense and helps?
Gary
 

Attachments

  • DSCN4053.JPG
    DSCN4053.JPG
    112.2 KB · Views: 20
  • DSCN4055.JPG
    DSCN4055.JPG
    114.3 KB · Views: 18
Thank you Gary, that is a good sound procedure, I'll be using it today.
I have replaced the stem, transom, four gunwales, 72 feet of planking 11 ribs, 34 rib tips, three thwarts and both seats. I don't want to mess up one of these last bits as I approach the end.
 
Wow 72 feet!
Don't worry about the canvassing. There are many different wrinkles (pun intended) that people adopt to make this process easier for how they do it. In the end as long as you have good horizontal stretch and some mode of adding vertical pressure to help you as you pull the canvas tight it will turn out fine.
I find this stage, along with that first coat of varnish on a well stripped and sanded interior, to be one of the most satisfying. Enjoy it!
Gary
 
Yeah 72 ft of planking, that adds up fast on an 18 ft square stern. All that after I got the polyester resin and cloth heated off, yup someone classed the thing.
The canvas is on stretched and tacked but for the bow which I'll be using your procedure this afternoon to finish up the canvasing. The inside is done I laid on four coats of spar varnish, seats, deck and thwarts are installed just the outside left to finish.
 
Dave,

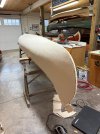
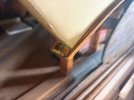
You had two questions. First, where to end the canvas slit prior to stretching and tacking along the stem. First before you cut the canvas free from the stretcher clamps locate a spot on the top of the stem (bottom of the canoe actually) where the canvas is tight and tap in a tack or two into the stem. This will help prevent the canvas, at that point, from relaxing and sliding back toward the center of the boat. You can then cut the canoe free from the clamps. With the canoe up side down on sawhorses grasp the canvas in a fold in line with the centerline of the boat. Locate a spot on the fold where it lifts or rises slightly off the stem. That’s where the slit should stop. Bear in mind that you will need enough canvas on each side to cross over each side of the slit. You can always make the slit a little longer if needed as you proceed stretching and tacking but if the slit is too long at the start……I don’t want to think about that. As you are stretching the canvas over the stem I have found it helpful to pull the canvas over the extreme end of the boat and put in a couple temporary tacks to keep it tight. Working alternately pull the canvas across the stem and tight along the gunwale, working back and forth until you get it complete. Trim off the excess along the stem and repeat the process on the other side. Don’t forget the bedding compound. You can remove the tacks you put in on the top of the stem, near the end of your slit, at this point if you want. Your second question was how to deal with the stem/inwale connection and how to deal with the canvas in that area. As Rolin said above you will need to cut the canvas so it wraps over the stem and still drops down past the inwale. You will tack or staple the canvas directly to the inwale at this point. Attached are a couple pictures. The pictures were not taken for the purpose of illustrating this problem but they may be of some minor helpIMG_7719A.JPGIMG_8169A.JPG.

These two pictures are of my Brodbeck canoe which I completed in June. There you have it. Clear as mud. Good luck with your project.

Jim
 
Back
Top