rib tip splice pics

peterng

Enthusiastic Novice
Hello,

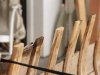
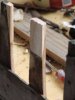
I am in the process of splicing some new rib tips in. I had spotted some great pictures that were in a thread here a month or so ago which I can not find now.

I am sure I went through every thread that had an attachment back to November.

Do those pictures ring a bell with anyone ? Maybe the author will see this and point me to the thread.

Thanks !
Peter
 
I don't know if these are the ones you refer to, but here are a couple of examples
 

Attachments

  • ribin-sm.jpg
    ribin-sm.jpg
    22.3 KB · Views: 564
  • ribout-sm.jpg
    ribout-sm.jpg
    21.4 KB · Views: 583
Mike,

Those aren't the pictures I was thinking of but those are perfect.

I was wondering about whether or not to keep the interior splice location below the gunwale location or not. Also I was wondering about the general length of the taper.

Both incidentally look to be about the same as what i used. Using Gorilla glue, waterproof so I figured she'd be good to go. I was going to use that Titebond 3 that someone recommended but never did order it.

Thanks ! great pictures.
Pete
 
peterng said:
whether or not to keep the interior splice location below the gunwale location or not. Also I was wondering about the general length of the taper.

Pete

If you start the taper on the outside, tapering up towards the interior it will look better and will keep the joint as close as possible to the inwale. I uses approximately a 8 or 10:1 taper (2-3 inches over the 5/16" thickness of the rib)

Good luck.
 
How would the unskilled woodworker go about learning to splice like that other than the obvious - practice?
 
Practice is best...not on the canoe at first and you could also make a jig for a block plane, clamped over the rib and give you the 8:1 ratio. You have to remove some of the planking to accomplish this. The guru's of this art can probably do it by eye...not me.

Let us know if this is not clear and good luck.

Ric Altfather
 
I've always just done it by eye. Amazing what you can do that way! Determine your scarf length (1:8 to 1:12 like Mike says, based on the thickness of the rib). Scribe a line that far away from the uppermost part of the good part of the rib (does that make sense?). Cut your scarf like Mike says, if your inside glue line is on or just below the inwale, you'll never see it. If you need to replace more than that, put in a new rib.

Use a 2" chisel to cut away the waste, leaving your line below and a feather edge above. use a straight edge to check the scarf. Now do the same on the bit you are going to glue on. Double check that your new piece will lay flat both on the scarf and the inwale. Sounds like a lot, but the reality is less than 10 minutes per rib, closer to 5 when you get good.

Now here's the trick. Butter your scarf with glue (I've always used epoxy, but I'm thinking Titebond III may be the ticket - assuming you get well-cut scarfs), and nail it, or at least clamp it, in position to the inwale before clamping to the rib. That way it won't slither out of position.

It's fun - have at it!

Cheers,
Dan
 
the magic eyeball is pretty easy. Especially if you make the replacement stock a hair thick so you can shave it and contour it to the old rib dimensions.

Another way to approach it is to take your replacement stock and fasten it to the inside of the old rib (I used hot melt glue for a temporary bond) you can then plane at an angle across both the old and new rib stock. You will have complementary angles which will match perfectly if you reverse the replacement piece. I'll try to attach something I drew on MS Paint - lousy diagram, but might illustrate it better than my feeble words.
 

Attachments

  • rib top.bmp
    750.1 KB · Views: 488
Mike,
Another advantage to your method it that the actual rib has a backer which will prevent splitting it out.
Denis
 
Great advice - thanks. I had done my first repair of this type last fall splicing a new piece to a damaged outwale. Not sure if it will be a permanent repair but it was quick'ish to do and I wanted to get the, new to me, boat in the water. It was not a bad first attempt but this advise will come in useful if I have to do it again.

Thanks again!
John
 
I do something similar to what Mike Cav describes, but I use a very fine tooth saw that makes instantly perfect mating surfaces. I use a "Sharksaw" dovetail saw that cuts cleanly and precisely on the pull stroke. It has a very high tooth count (26 teeth per inch), and a very thin kerf (0.02"), so the cut is very precise. By mating the old rib and the new piece of stock, then cutting (at same angle direction and about the same slope as Mike described), the splice is ready to be glued in a matter of seconds. The mating surfaces match perfectly. No need for eyeballing, no need for adjustments with a block plane. Amazingly fast production of a perfect splice every time. Saw costs about $15, replacement blades are about $8 if memory serves.
 

Attachments

  • 00002889.jpg
    00002889.jpg
    13.7 KB · Views: 301
Last edited:
JParsons said:
How would the unskilled woodworker go about learning to splice like that other than the obvious - practice?

Practice are you kidding me ? I don't have time for that ! The unskilled woodworker builds a jig :)

new tip jig.jpg


and another jig

old tip splice.jpg


I thought about the flush cut pull saw but the low angle block plane with a good edge cuts through pretty quickly

old tip splice after.jpg


a bit of gorilla glue and 1.3 million clamps later she's good to go.

glued up.jpg


JMETZ - thank you, that is exactly what I had seen, great photo compilation, lotta fun !

Thanks to the rest as well, I love reading all the different ways of doing things.
Peter
 
Brilliant! I wish I had thought of the pull saw through 2 piece solution. Why didn't you guys tell me that back in 2002 ?!? :)
 
Back
Top