Garboard gaps

dumbquestionsguy

Name says it all, people.
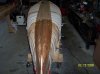
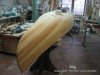
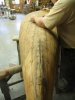
So as not to disappoint, I have yet another well, dumb question... Because of the geometry of the boat I'm building (yes, I realize this is taking me forever) I'm coming up with a little bit of a gap where the garboards get sanded back to reveal the stem - basically the spot where the curvature of the stem joins the relative flatness of the bottom, if that makes any sense. Because of the angle the planks run past the stem, I sanded them flush with the front of the stem, so to speak, and now I've got this space where the thickness of the planking needs to get bevelled into the stem. I know a picture would help, but ye old battery died in ye old camera the other day, and I didn't have time time to replace it.

It's probably something I'm doing wrong (it usually is) or else there's a way to do this without creating this gap. Maybe I didn't get the planking snug enough to the stem. I don't know. Just don't want it to be an empty space under the canvas that could get punctured...
 
Dqg

Good to see you are still plugging away. The two garboards are laying side by side as tight as possible. they have to bend rather remarkably from the flat of the bottom to the vertical of the stem. As you shpe them there is an area betwixt and between that you try to get as smooth as possible. With the canoe inverted on sawhorses the planks will have an inverted V on the stem. I've seem some where the plank is notched around this area. Just get it as good as you can and the next one even better. Perhaps someone can post a photo of the area. I found one photo that shows somewhat.
Keep at it.
 

Attachments

  • 100_1635.jpg
    100_1635.jpg
    59.1 KB · Views: 365
This is a pretty tricky part of the planking.

You run the plank straight along the center line of the canoe and let it run off the stem. Before you try and fasten it, you need to thin it where it "wraps" along the stem center. You thin it to about half thickness for about 2cm of the plank width. No need to thin it past the heel of the stem.

I now fasten the planking to the stem with stainless steel staples, 5/16" size. the drive in better and hold well. Fasten along the stem first, the work down. I use boiling water poured over the encourage the planking to bend.

After it is fastened, then take a sharp knife and trim the planking to the center line. Treat the plank for the other side the same way.

Its more difficult to write a good description than to do. Seeing it done is best. I hope that the photo shows something useful. It was the first one that I found that could be.
 

Attachments

  • April 17, 2009 002.jpg
    April 17, 2009 002.jpg
    55.7 KB · Views: 363
I've actually already basically completed the planking - I was going to go back now and touch up those trouble points - guess I missed the chance to thin the planks. It's probably partially a result of not quite having the right bevel on the bottom of the stem and having the planking sit just a little more proud than you experienced builders have yours. Crap. Well, boat number 2 will be better... Hopefully this doesn't present any problems canvassing, or putting on the stemband.

Thanks again for your help and tolerance. Eternally indebted....
 
Sure anyone can do a neat job using two garboard planks, but what about just using one centered garboard plank!
I found this on a early E.M. White, estimate about 1900. I do not recall seing it ever done on any other Whites. When I took the canvas off and was trying to find the center of the canoe it took me a few minutes to figure out what was going on!:confused:
Rollin
 

Attachments

  • Center guarboard.jpg
    Center guarboard.jpg
    186.8 KB · Views: 373
While that is very interesting, the bigger question that I have is, how do you keep your floor so clean!?
 
An interesting question. I like to keep most of my usefull shop tricks private but I guess I can let this one out.
The soles of my shop work boots are hollow. The soles are open just below the toes. As I shuffel around the shop my shoes just naturally sweep up the shavings on the floor. As the soles fill up I can force a bit more into the space by flexing my toes and force the shavings to the back of the soles. when the soles are really filled up I can just turn the heel which opens up the back of the soles and empty the soles into the trash.
Feel free to use this trick!
Rollin
 
Clever! Now I just have to find me some boots like that. Are they only available in Maine?

While I look I'm going to stick with my big broom and cordless leaf blower. I never imagined that I would own a leaf blower, never mind use it to blast out the dust from the shop.
 
Douglas Ingram said:
Clever! Now I just have to find me some boots like that. Are they only available in Maine?
There's an old guy up near Seboomick that makes these. He has a couple models to choose from. Rollin uses the basic model. They can also be used for mowing lawns. Beats the hell out of bagging the clippings.
I have also heard that you can use them for picking fiddleheads. If you know how to wiggle your toes the right way the shoes will remove the skin from the ferns!
I hear he has also been working on a model that can be used for clamming but that the concept does not seem to be working out. He can't seem to get them to stop self shucking, pretty messy stuff ends up between your toes.

Rollin, you are an inspiration......
 
Back
Top