cracked rib backside repair opinions

sam.p

Enthusiastic about Wooden Canoes
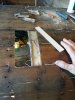
I'm restoring my 1944/45 St. Louis Boat and Canoe Company canoe http://forums.wcha.org/showthread.php?12660-just-found-St-Louis-Boat-and-Canoe-Company-canoe and it has two cracked, not broken, ribs. Do any of you guys have an opinion on a rectangular vs shaped dutchman.jpg
backside repair as far as strength and durability.

thanks
sam
 
My opinion is that a backside repair does more harm than good. If the hull is not deformed leave it alone and if it is then replace the rib. Thats just my amateur opinion, there are plenty of others who have done some very elaborate backside repairs. Let us know hoe it goes and photos please.
 
I think a rectangle is way better than a butterfly in terms of ease of construction and no real difference in strength. I've done several normal backside repairs with success.

Another backside rib repair to think of is the kind that doesn't require removing any planking. Using a router and a fixture rout out the plug through the plank and part way into the rib. Plug that so that it's flush to the original planking. It's a bit outside the box but should work just fine. If someone else has actual experience with this type of repair, your input would be greatly appreciated.
 
I make my patches shaped with a radius on the ends....ala tongue depressor, except fatter, of course. Or sometimes even pointed on the ends. I pre-bend them if it is on a bent part of the rib. I always use epoxy. I always have a backer on the inside of the rib that matches the contour
I went away from the rectangle. I got the feeling that the straight ends, across the width of the rib could cause a week spot.

Ive done multiple backside repairs on dozens of canoes without a failure to date that I'm aware of....even when I was doing the rectangular..... I do this in an effort to maintain the originality. Also so that I don't have to "play the stain game" to match stark white new cedar ribs to look as if it was always there.
 
Thanks for the input you guys. I love this forum. The pointed ends patch is an interesting concept and makes sense from a structural standpoint. I plan on starting with the rib repair this weekend. I am going to use System Three T88 epoxy it claims not to be brittle after cure (which sounds like a good thing). I'll post pictures.

sam
 
Sam,

I'm lazy and not hung-up on traditional woodworking methods.

When I do a backside, I just dig out a trough and fill it with thickened epoxy. No solid wood insert.
If anything it might be stiffer than wood, but it's a very short length and I suspect (but don't know) it will have little impact on the flexibility of the hull. I haven't heard of any problems on canoes I've done it to.

And like Dave, I do it to avoid replacing a whole rib to maintain originality. And I only do it if I'm not replacing a bunch of other ribs and the hull shape is still there.

Dan
 
To reply to Dave W's request to hear from others who have performed backside repairs without removing planking by routing thru planking into 1/2 the thickness of the underlying rib. I have done this as an experiment on two of my canoes to see how they held up. It has been several years and no problems have cropped up. I make a special jig from black locust that is used to keep the router from wandering off your intended splice area. Depending on the curvature of the hull where the cracked rib is located often requires making a jig up for each rib to be repaired. I use West system epoxy on my backside repair plugs and take special care with wax paper to minimize getting epoxy on the planking. The repair plugs are of black locust and are cut to rib curvature shape on the bandsaw. I round over the plug splice ends. Interesting that Dave O indicated he does that also. I do it primarily to exactly fit the routed out portion (the router bit leaves a rounded end to the excavation).
 
My repair

Attached are two photos of a repair I did on my Double End boat. I cut back the planking on the cracked rib only enough to carve out the center of it to receive the spline. I cut the slot with a utility knife and bench chisels. I left enough planking so I could still tack the ends of the old planks to the repaired rib when done. I pried open the break enough to get some glue inside when I glued in the spline – Titebond III. The rib on the left was badly broken and removed completely. After the new rib was installed I cut back the planking to the center of it and installed new planking that spanned across the repaired rib and the new one. Sorry no pic of the installed spline but it seemed to work out well. I used Titebond rather than epoxy because of the longer working time it affords.

Jim
 

Attachments

  • BackSideRepair.jpg
    BackSideRepair.jpg
    265.4 KB · Views: 317
  • BackSideRepair2.jpg
    BackSideRepair2.jpg
    252.6 KB · Views: 303
Back
Top